On ServiceTitan Starter or Essentials, ReviewWheel connects through your invoice emails. Setup has two parts. Do both once and you're done.
1. BCC your invoice email to ReviewWheel. Each invoice ServiceTitan emails then asks that customer for a review.
2. Add a Customer cell field to your invoice. ServiceTitan's invoice doesn't print the customer's phone number. This field puts it there, so ReviewWheel can read the cell number from each invoice as well as the email address.
Part 1: BCC your invoice email
1. In ReviewWheel, go to Connections, choose Add Connection, then pick ServiceTitan.
2. For ServiceTitan plan, choose Starter or Essentials.
3. Tap the yellow button to make your ReviewWheel email address, then copy it.
4. In ServiceTitan, go to Settings, then Invoicing, then Email.
5. Open the invoice email template your team uses and paste the email address in the BCC field. Save.
Your customer never sees the BCC. The connection page says it's waiting for your first invoice until one arrives.
ReviewWheel only sees invoices ServiceTitan emails. If your invoices don't go out by email when a job is completed, ask ServiceTitan Technical Support to turn on Automatic Invoicing.
Part 2: Add a Customer cell field to your invoice
ServiceTitan has no built-in invoice field for the customer's phone number. Their fix is a custom field on the customer record, added to your invoice template. Use these exact words so ReviewWheel finds the number:
Field name: Customer cell
Label: Customer cell
The label prints on the invoice your customer gets, next to their name, like this: Customer cell: (555) 010-0123.
You need to be a ServiceTitan admin. The screenshots below are from ServiceTitan's help center.
Step 1: Create the field
1. In ServiceTitan, click Settings in the top toolbar.
2. In the side panel, click Operations, then Custom Fields.
3. Click Add.
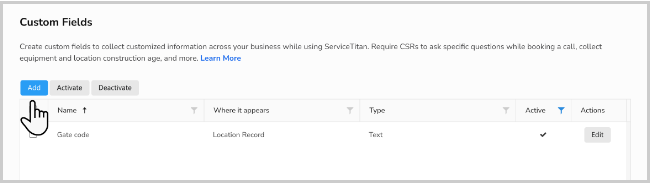
4. In Name, type Customer cell.
5. Under Where It Appears, check Customer Record only.
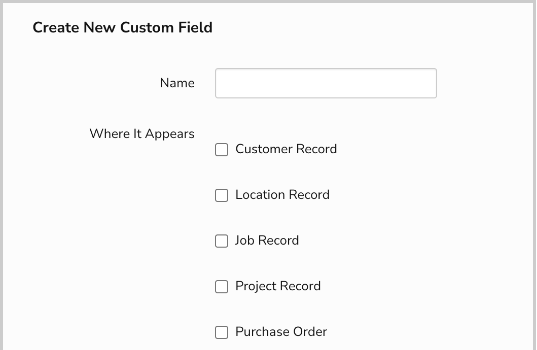
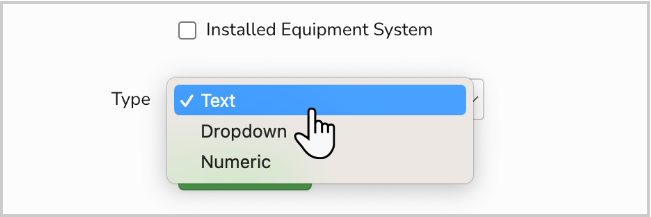
6. From the Type dropdown, choose Text. Text keeps the dashes and brackets in a phone number.
7. Click Save. If you don't see the new field, refresh the page.
Step 2: Put the field on your invoice
This uses ServiceTitan's Template Manager. If you don't see Document Templates in Settings, ServiceTitan has to turn it on for your account. Ask ServiceTitan Technical Support at go.servicetitan.com/ask to enable Template Manager.
1. Click Settings, then in the side panel click Operations, then Document Templates.
2. Find the invoice template marked Default. ServiceTitan's own templates can't be edited, so click More, then Make a copy. If your default is a template your team already made, skip to step 4 and edit it.
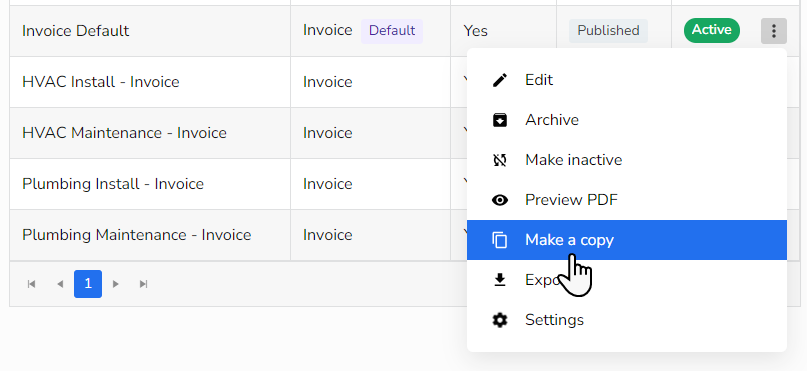
3. Name the copy, for example Invoice with Customer cell. Keep Template type as Invoice. Click Make a Copy.
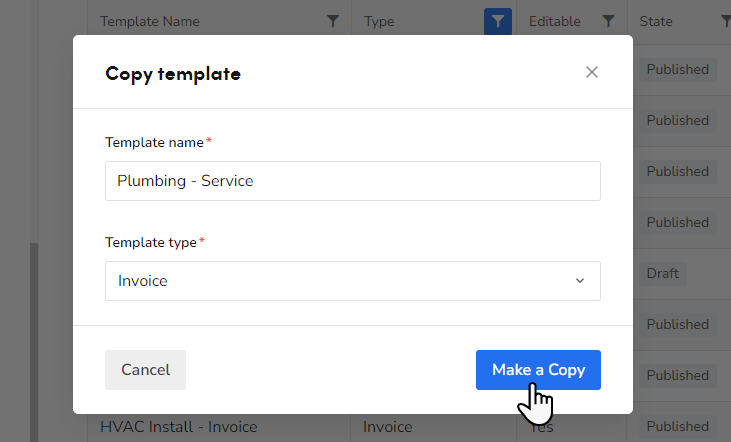
4. Find your copy and click More, then Edit.
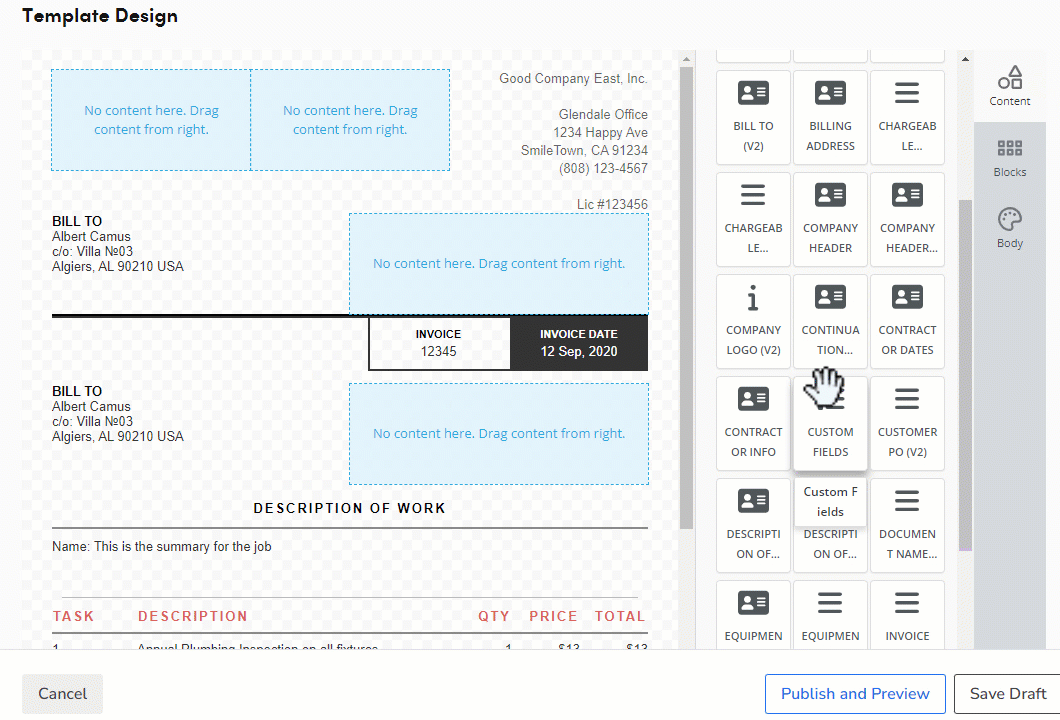
5. In the components panel on the right, find Custom Fields. Drag it into the empty box beside Bill To, so the number prints next to the customer's name.
6. Click Add Field.
7. In the Add Custom Field window, type the field name exactly: Customer cell. In Label, type Customer cell.
8. Click Save and Publish.
Step 3: Make the copy your default
Invoices that ServiceTitan sends automatically use your default template. Your copy has to be it.
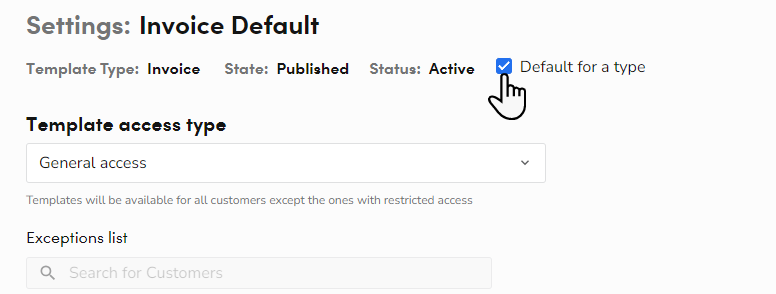
1. In Document Templates, find your copy and click More, then Settings.
2. Check Default for a type. At the popup, click Set as Default, then Save.
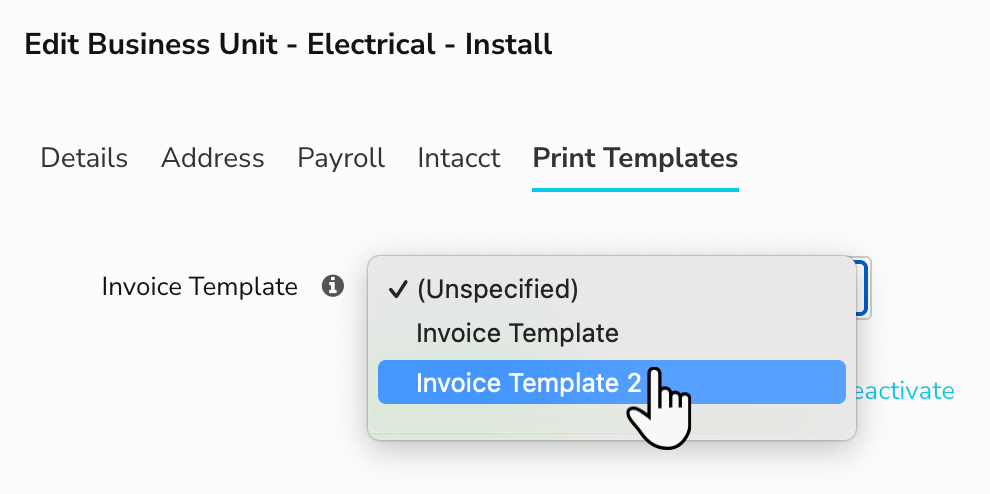
If your business units have their own invoice template, set your copy there too: Settings, Operations, Business Units, Edit, then the Print Templates tab. Pick your copy in Invoice Template and click Save. Do this for each business unit.
Step 4: Fill it in for each customer
The new field starts empty. It doesn't copy the phone number already on the customer record. Your office types the customer's cell number into Customer cell on the customer record:
New customers: when you book the call.
Repeat customers: before the job is completed, the first time you see them after setup.
Add it to your booking script so every CSR asks for it.
Can I make it required at booking?
Not this field. ServiceTitan only lets you require a custom field on the Call Booking screen when it's on the Job Record, and Customer cell lives on the customer record. ServiceTitan also warns that adding any custom field to Call Booking stops job type, business unit, campaign, and priority from filling in on their own, so your CSRs would set those by hand on every call. We recommend the booking script instead.
Check it works
Pick a customer, fill in Customer cell, and preview or print one of their invoices. You should see Customer cell: and the number beside Bill To. When that customer's invoice email reaches ReviewWheel, ReviewWheel reads the cell number from it and texts the review request too, under the usual consent and opt-out rules.